


 下载插件并导入HBuilderX
 下载插件ZIP
 赞赏(0)
赞赏(0)
更新记录
1.0.1(2024-02-04)
插件重新上传
1.0.0(2024-01-09)
初始化插件
平台兼容性
| Vue2 | Vue3 |
|---|---|
| √ | √ |
| App | 快应用 | 微信小程序 | 支付宝小程序 | 百度小程序 | 字节小程序 | QQ小程序 |
|---|---|---|---|---|---|---|
| HBuilderX 3.6.2 app-vue | √ | √ | √ | √ | √ | √ |
| 钉钉小程序 | 快手小程序 | 飞书小程序 | 京东小程序 |
|---|---|---|---|
| √ | √ | √ | √ |
| H5-Safari | Android Browser | 微信浏览器(Android) | QQ浏览器(Android) | Chrome | IE | Edge | Firefox | PC-Safari |
|---|---|---|---|---|---|---|---|---|
| √ | √ | √ | √ | √ | √ | √ | √ | √ |
一、安装OSS
在项目的根目录下执行命令:
npm install ali-oss --save
二、获取oss访问域名
登录阿里云oss控台,在概览里面获取bucket域名,
 Bucket 域名示例:test.oss-cn-beijing.aliyuncs.com
  const client = new OSS({
    endpoint: "oss-cn-beijing.aliyuncs.com",
    accessKeyId: accessKeyId,
    accessKeySecret: accessKeySecret,
    bucket: "test",
});
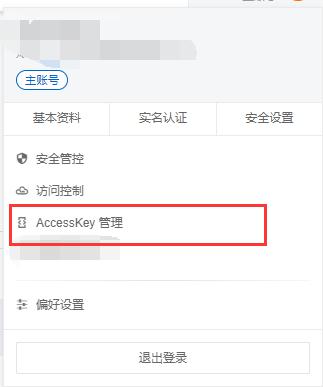
三、获取OSS秘钥
登录阿里云个人中心,获取账户的AccessKey ID和AccessKey Secret,推荐使用子用户的AccessKey
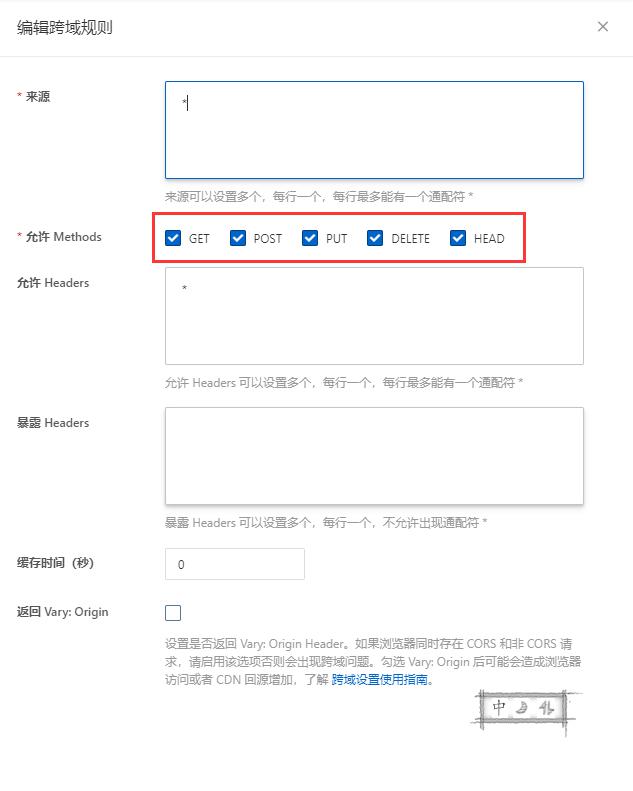
四、设置CORS支持跨域
在bucket里面:数据安全 -> 跨域设置,按下图创建一条规则,勾选:GET、POST、PUT、DELETE、HEAD
五、修改配置文件
将ossutil文件夹放在js_sdk文件夹下,打开文件/js_sdk/ossutil/uploadFile.js,将前面获取到的信息复制到此处
  const endpoint = "xxxxxxx"; // 示例:'oss-cn-hangzhou',填写Bucket所在地域。
  const accessKeyId = "xxxxxxxxx"; //AccessKeyId 去你的阿里云上控制台上找
  const accessKeySecret = "xxxxxxxxx"; //AccessKeySecret 去你的阿里云上控制台上找
  const bucket = "xxxxxxxxx"; // 示例:'my-bucket-name',填写存储空间名称。
六、页面调用
页面引入方式为:
<template>
  <uni-file-picker :auto-upload="false" class="imgItem" :readonly="type == 'view'? true: false"
    v-model="compressStart" fileMediatype="image" file-extname="png,jpg" mode="grid" :limit="1"
    @select="selectImg($event)" @delete="delImg($event)">
  </uni-file-picker>
</template>

<script>
 import {
    uploadFile,
    deleteFile
} from "../../js_sdk/ossutil/uploadFile.js";

/**
 * @description 上传至阿里云
 */
async selectImg(e) {
    let filearr = e.tempFiles
    // 支持多图片上传
    for (var i = 0; i < filearr.length; i++) {
        let filepath = filearr[i].path;
        try {
            let result = await uploadFile(filepath, filearr[i].extname, '/');
            if (this.fileMap == null) {
                this.fileMap = new Map();
            }
            this.fileMap.set(filepath, result);
        } catch (e) {
            uni.showToast({
                title: '文件上传OSS失败',
                icon: 'none'
            })
        }
    }
},
/**
 * @description 文件删除
 */
async delImg(e) {
    if (this.fileMap == null) {
        return;
    }
    try {
        let fileUrl = this.fileMap.get(e.tempFilePath);
        await deleteFile(fileUrl);
        this.fileMap.delete(e.tempFilePath);
    } catch (e) {
        uni.showToast({
            title: '文件删除失败',
            icon: 'none'
        })
    }
},

</script>
uploadFile函数对应的3个参数依次是:
- filepath: 本地的文件路径,代码不用修改
- extname: 文件扩展名,示例文件名:123.png 扩展名为png,代码不用修改
- dir: 文件上传到oss的哪个文件夹,为空则上传到根目录,示例:/test/a/
delImg 函数不用修改直接使用
七、技术交流群,有问题可在群内反馈
QQ群:705623891 
八、提醒
前端签名有密钥泄露风险,注意妥善保管accessKeyId和accessKeySecret 有问题请联系我微信

九、打赏
若帮助到您,请随意打赏

 下载 95
下载 95
 赞赏 0
赞赏 0

 下载 7766657
 赞赏 920


 赞赏
赞赏
 京公网安备:11010802035340号