更新记录
1.4.9(2024-04-07)
ios推送优化
1.4.8(2023-10-17)
修复华为打包报错的问题
1.4.7(2023-10-08)
修复安卓特殊配制打包报错的问题
查看更多
平台兼容性
| Android |
Android CPU类型 |
iOS |
| 适用版本区间:4.4 - 14.0 |
armeabi-v7a:支持,arm64-v8a:支持,x86:支持 |
适用版本区间:9 - 17 |
原生插件通用使用流程:
- 购买插件,选择该插件绑定的项目。
- 在HBuilderX里找到项目,在manifest的app原生插件配置中勾选模块,如需要填写参数则参考插件作者的文档添加。
- 根据插件作者的提供的文档开发代码,在代码中引用插件,调用插件功能。
- 打包自定义基座,选择插件,得到自定义基座,然后运行时选择自定义基座,进行log输出测试。
- 开发完毕后正式云打包
付费原生插件目前不支持离线打包。
Android 离线打包原生插件另见文档 https://nativesupport.dcloud.net.cn/NativePlugin/offline_package/android
iOS 离线打包原生插件另见文档 https://nativesupport.dcloud.net.cn/NativePlugin/offline_package/ios
注意事项:使用HBuilderX2.7.14以下版本,如果同一插件且同一appid下购买并绑定了多个包名,提交云打包界面提示包名绑定不一致时,需要在HBuilderX项目中manifest.json->“App原生插件配置”->”云端插件“列表中删除该插件重新选择
Tpns推送组件
tpns快速接入推送功能
推送组件TX-TPNS
| 函数名 |
参数 |
说明 |
| registerPush |
回调函数 |
注册推送 |
| 函数名 |
参数 |
说明 |
| addReceiveNotificationListener |
回调函数 |
设置接收推送的监听 |
| 函数名 |
参数 |
说明 |
| addOpenNotificationListener |
回调函数 |
设置点击的监听 |
| 函数名 |
参数 |
说明 |
| unregisterPush |
回调函数 |
取消注册 |
| 函数名 |
参数 |
说明 |
| appendTags |
{"tags":["test1","test2"]} 回调函数 |
添加tags |
| 函数名 |
参数 |
说明 |
| delTags |
{"tags":["test1","test2"]} 回调函数 |
删除tags |
| 函数名 |
参数 |
说明 |
| clearAndAppendTags |
{"tags":["test3","test4"]} 回调函数 |
清除并添加tags |
| 函数名 |
参数 |
说明 |
| clearTags |
回调函数 |
清除所有tags |
| 函数名 |
参数 |
说明 |
| upsertAttributes |
{"key1":"value1"} 回调函数 |
添加属性 |
| 函数名 |
参数 |
说明 |
| delAttributes |
{"attributes":["key1"]} 回调函数 |
删除属性 |
| 函数名 |
参数 |
说明 |
| clearAndAppendAttributes |
{"attributes":["key2"]} 回调函数 |
清除并添加属性 |
| 函数名 |
参数 |
说明 |
| clearAttributes |
回调函数 |
清除所有属性 |
| 函数名 |
参数 |
说明 |
| upsertAccounts |
{0:"account0"} 回调函数 |
添加账号 |
| 函数名 |
参数 |
说明 |
| delAccounts |
{"keys":[0]} 回调函数 |
删除账号 |
| 函数名 |
参数 |
说明 |
| clearAccounts |
回调函数 |
空已有账号 |
| 函数名 |
参数 |
说明 |
| setBadge |
{"num":0} 回调函数 |
tpns.setBadge({"num":0},result=>{}) ios端调用上报当前App角标数到TPNS服务器 |
| 函数名 |
参数 |
说明 |
| setApplicationBadgeNumber |
{"num":0} 回调函数 |
tpns.setApplicationBadgeNumber({num:0},result=>{ console.log(result); }). ios设置本地应用角标 |
| 函数名 |
参数 |
说明 |
| setBadgeNum |
{"num":0} 回调函数 |
tpns.setBadgeNum({"num":0},result=>{}) Android端调用上报当前App角标数到TPNS服务器 |
| 函数名 |
参数 |
说明 |
| resetBadgeNum |
回调函数 |
tpsn.resetBadgeNum(result=>{}) Android端调用重置图标 |
| 函数名 |
参数 |
说明 |
| createNotificationChannel |
{} 参数列表见下 回调函数 |
tpns.createNotificationChannel({},result=>{ }) 创建通知渠道 |
| 参数 |
说明 |
| channelId |
频道id String类型 |
| channelName |
通知渠道名称 String类型 |
| enableVibration |
是否震动 bool类型 |
| enableLights |
是否有呼吸 bool类型 |
| enableSound |
是否有铃声 bool类型 |
| soundUri |
音乐文件名,String类型 enableSound 为 true 才有效 |
| 函数名 |
参数 |
说明 |
| cancelAllNotifaction |
回调函数 |
tpsn.cancelAllNotifaction(result=>{})清除通知栏消息(安卓端) |
| 函数名 |
参数 |
说明 |
| cancelNotifaction |
{id:xxx,result=>{}} 参数调用形式 |
取消指定的通知(安卓端) |
快速接入步骤
1.腾讯云tpns控制台创建应用
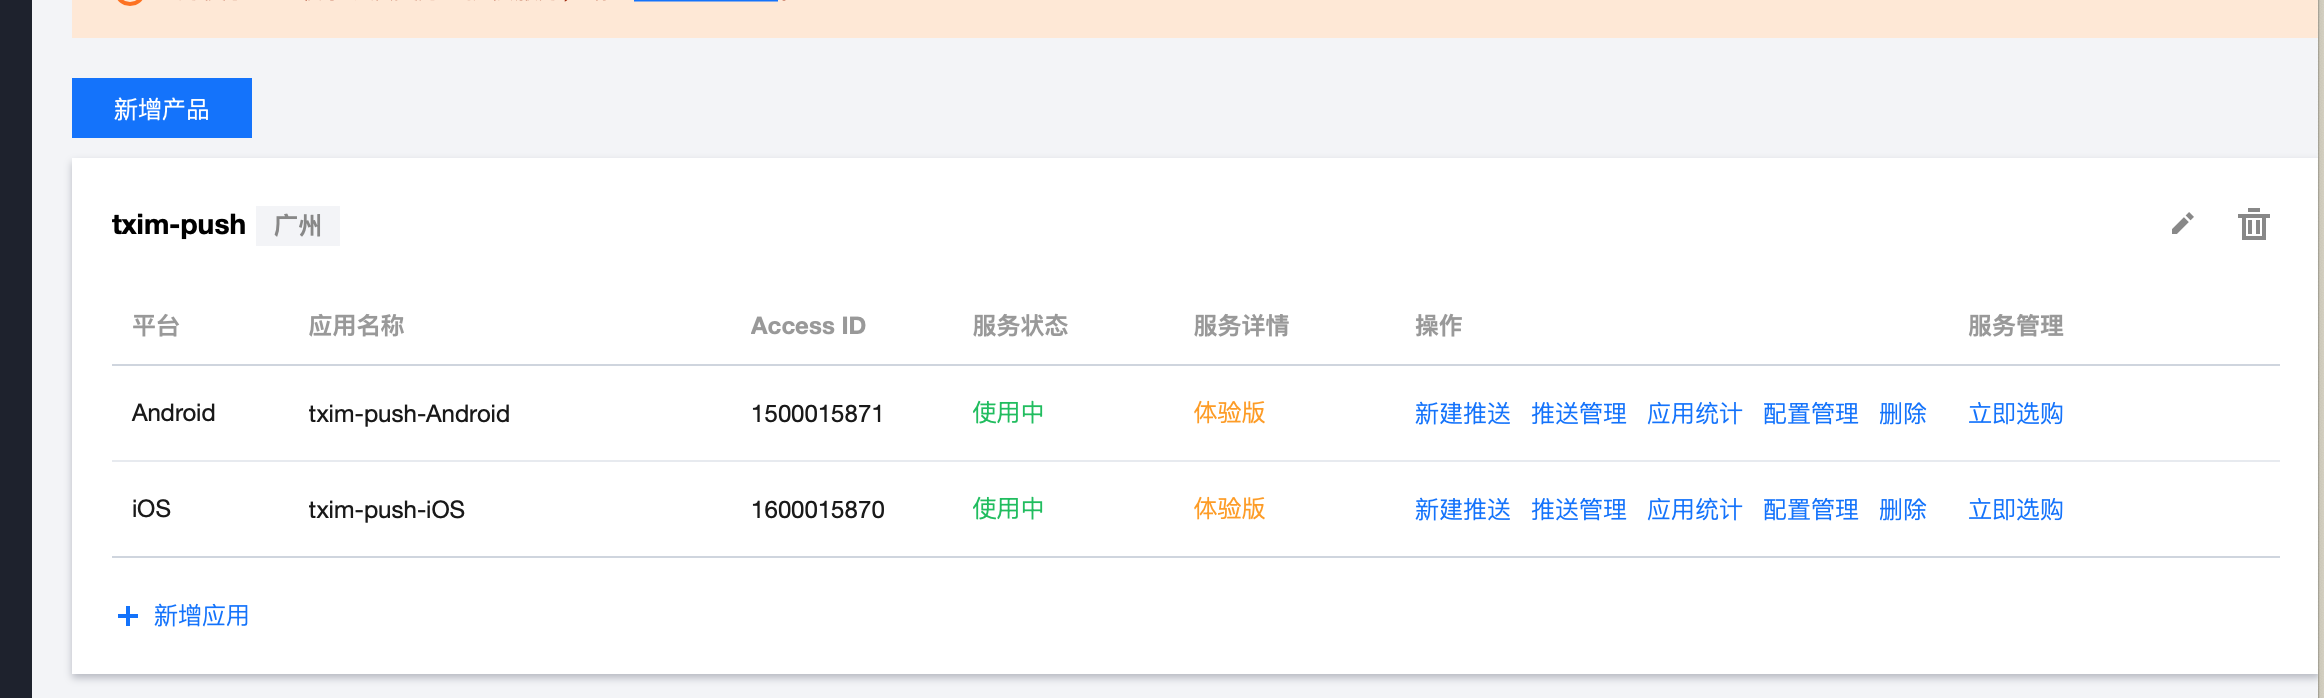
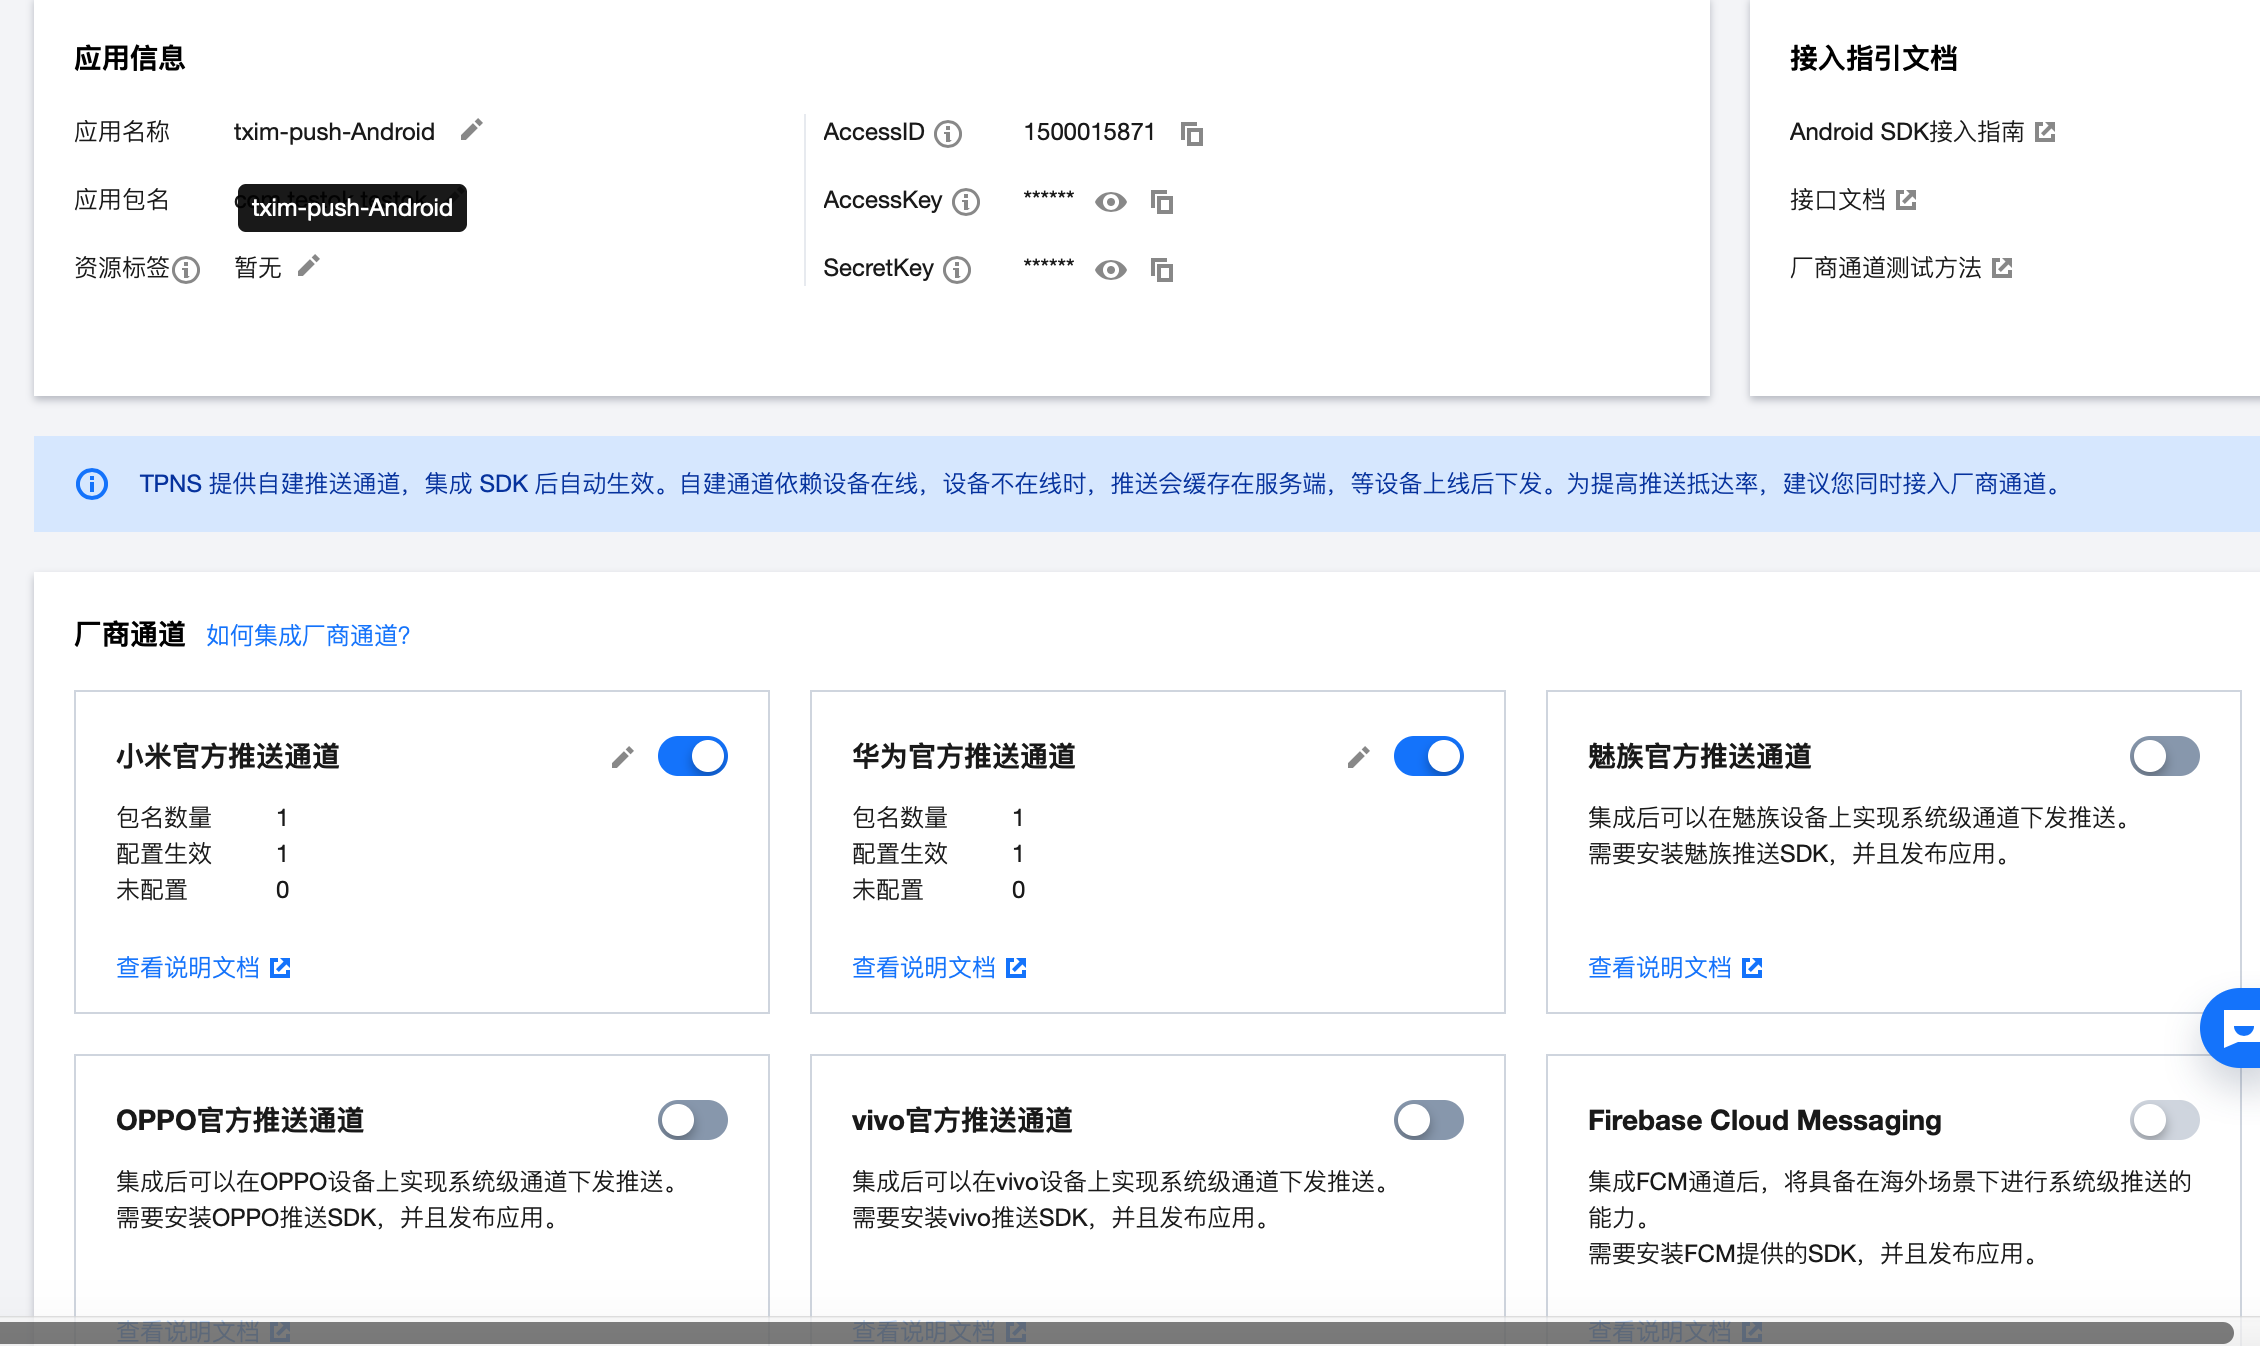
2.配置安卓的厂商通道
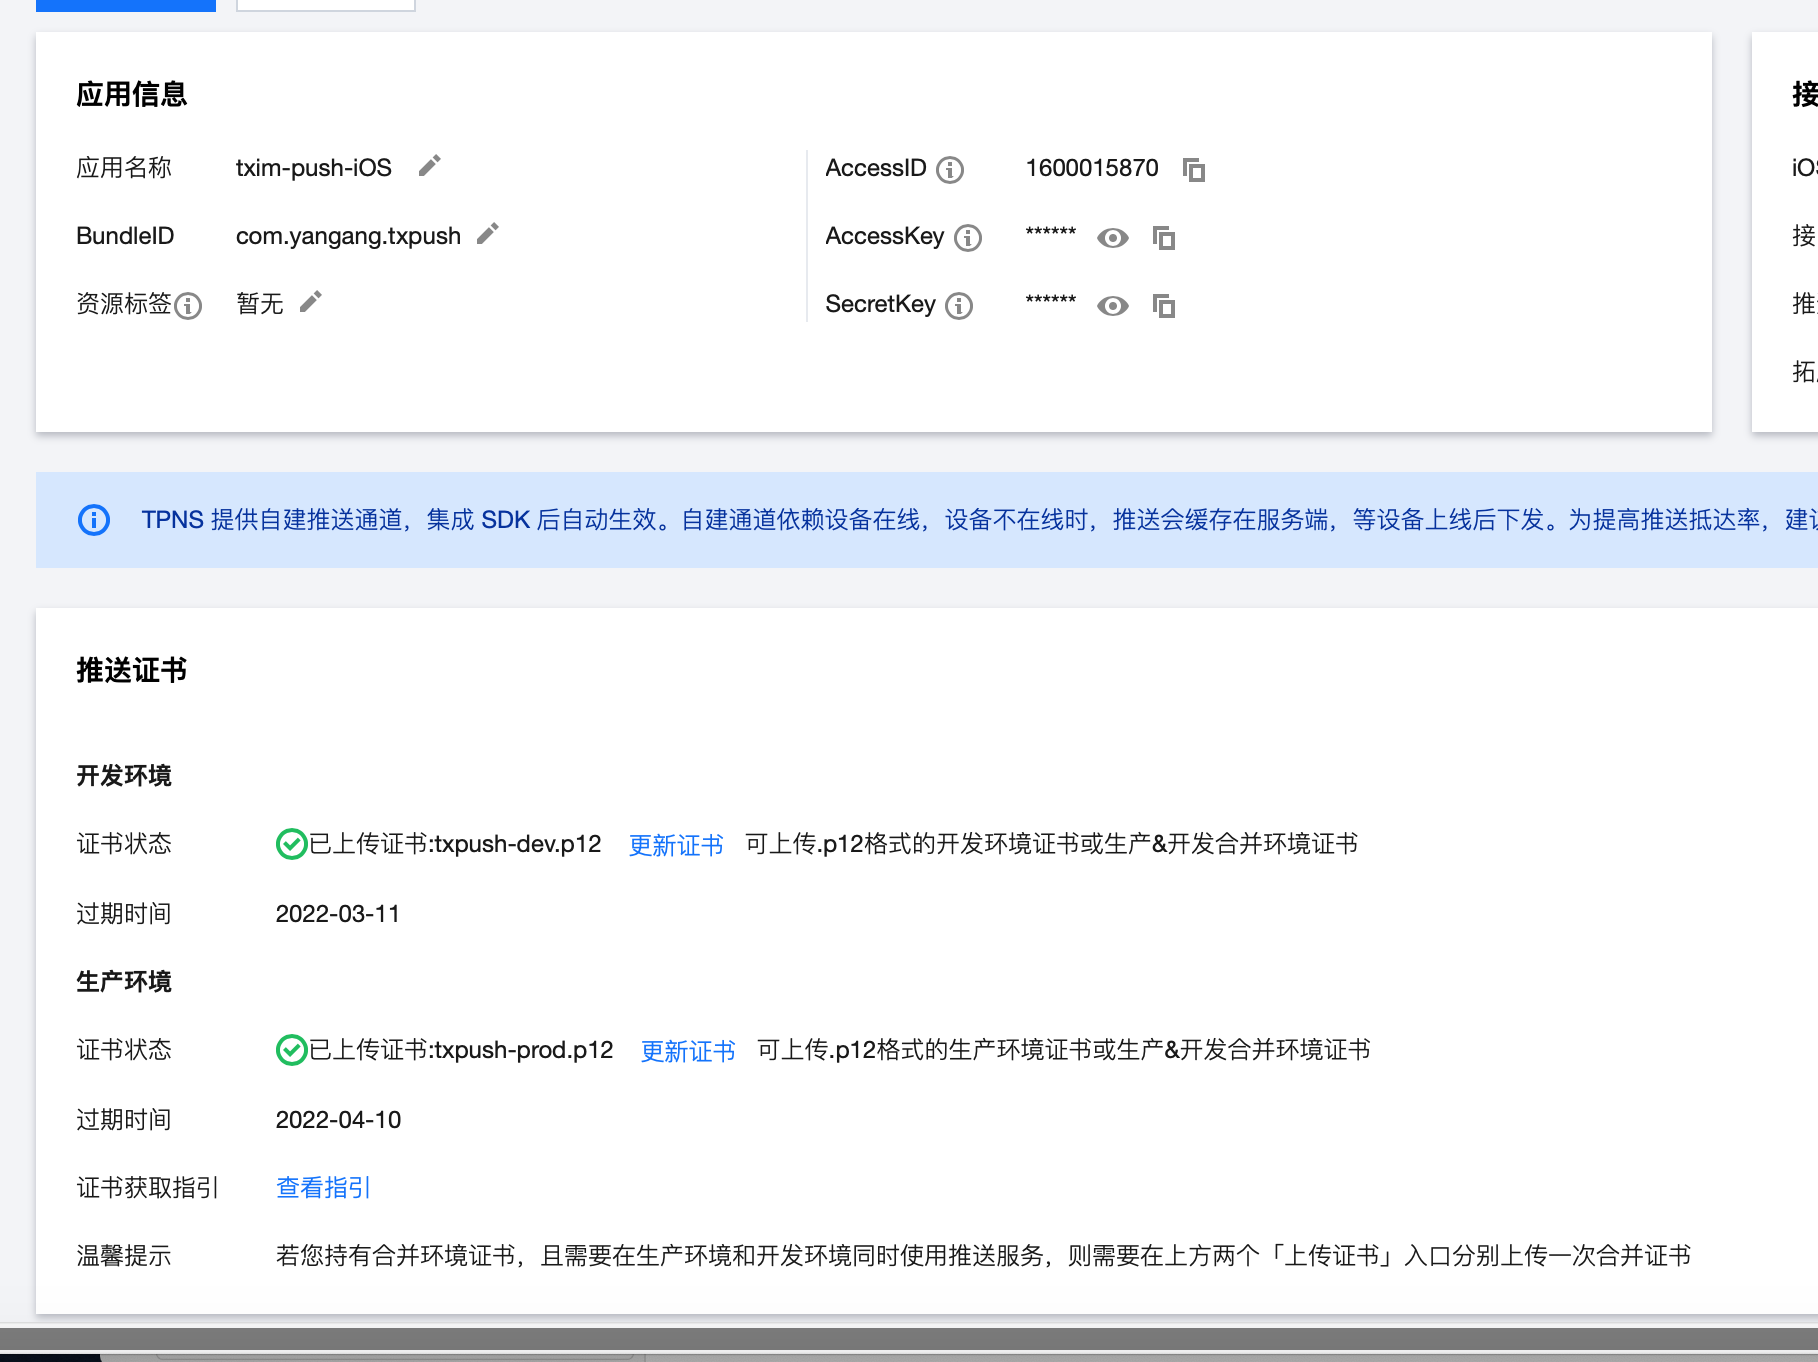
3.配置ios的推送证书
证书制作流程参考:https://cloud.tencent.com/document/product/548/36664
4.配置插件需要的各个平台的参数
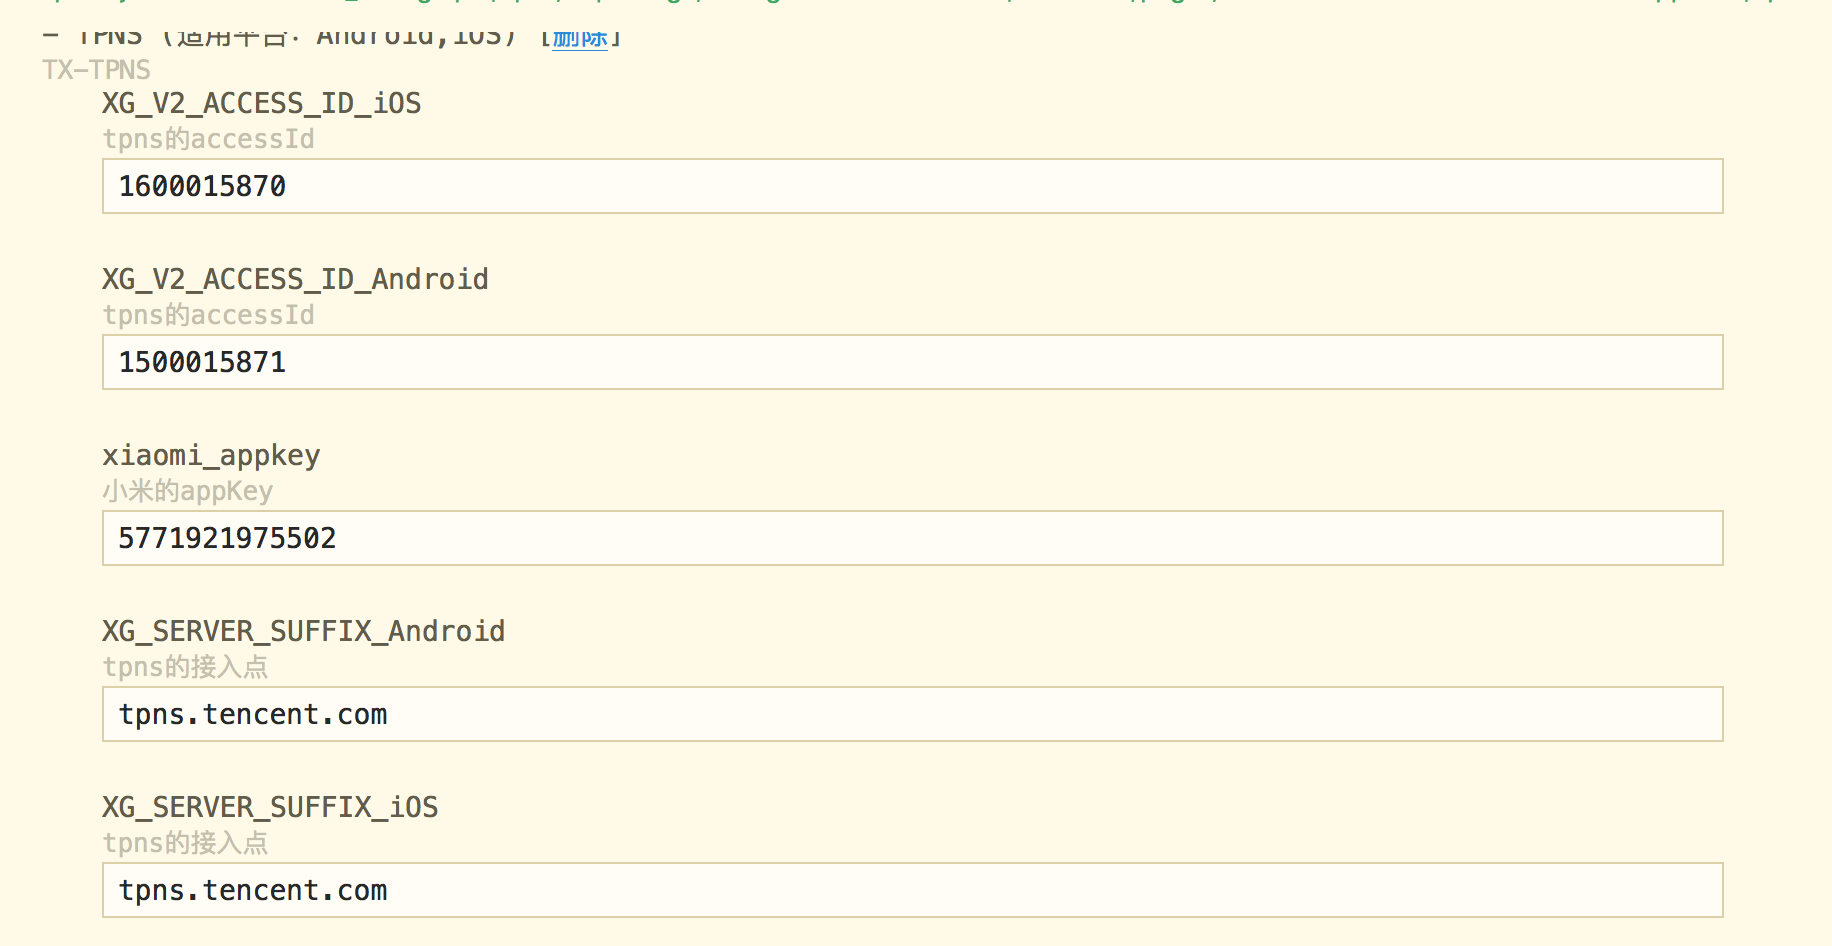
各个参数说明
| 参数 |
说明 |
| XG_V2_ACCESS_ID_Android |
tpns的accessId |
| XG_V2_ACCESS_KEY_Android |
tpns的accesskey |
| XG_V2_ACCESS_ID_iOS |
tpns的accessId |
| XG_V2_ACCESS_KEY_iOS |
tpns的accesskey |
| XG_SERVER_SUFFIX_Android |
tpns的接入点 |
| XG_SERVER_SUFFIX_iOS |
tpns的接入点 |
| xiaomi_appkey |
小米的appKey |
| xiaomi_appid |
小米的appId |
| huawei_appid |
华为的appId |
| oppo_appkey |
oppo的appkey |
| oppo_appsecret |
oppo的appsecre |
| meizu_appid |
魅族的appId |
| meizu_appkey |
魅族的appkey |
| vivo_appid |
vivo的appId |
| vivo_appkey |
vivo的appkey |
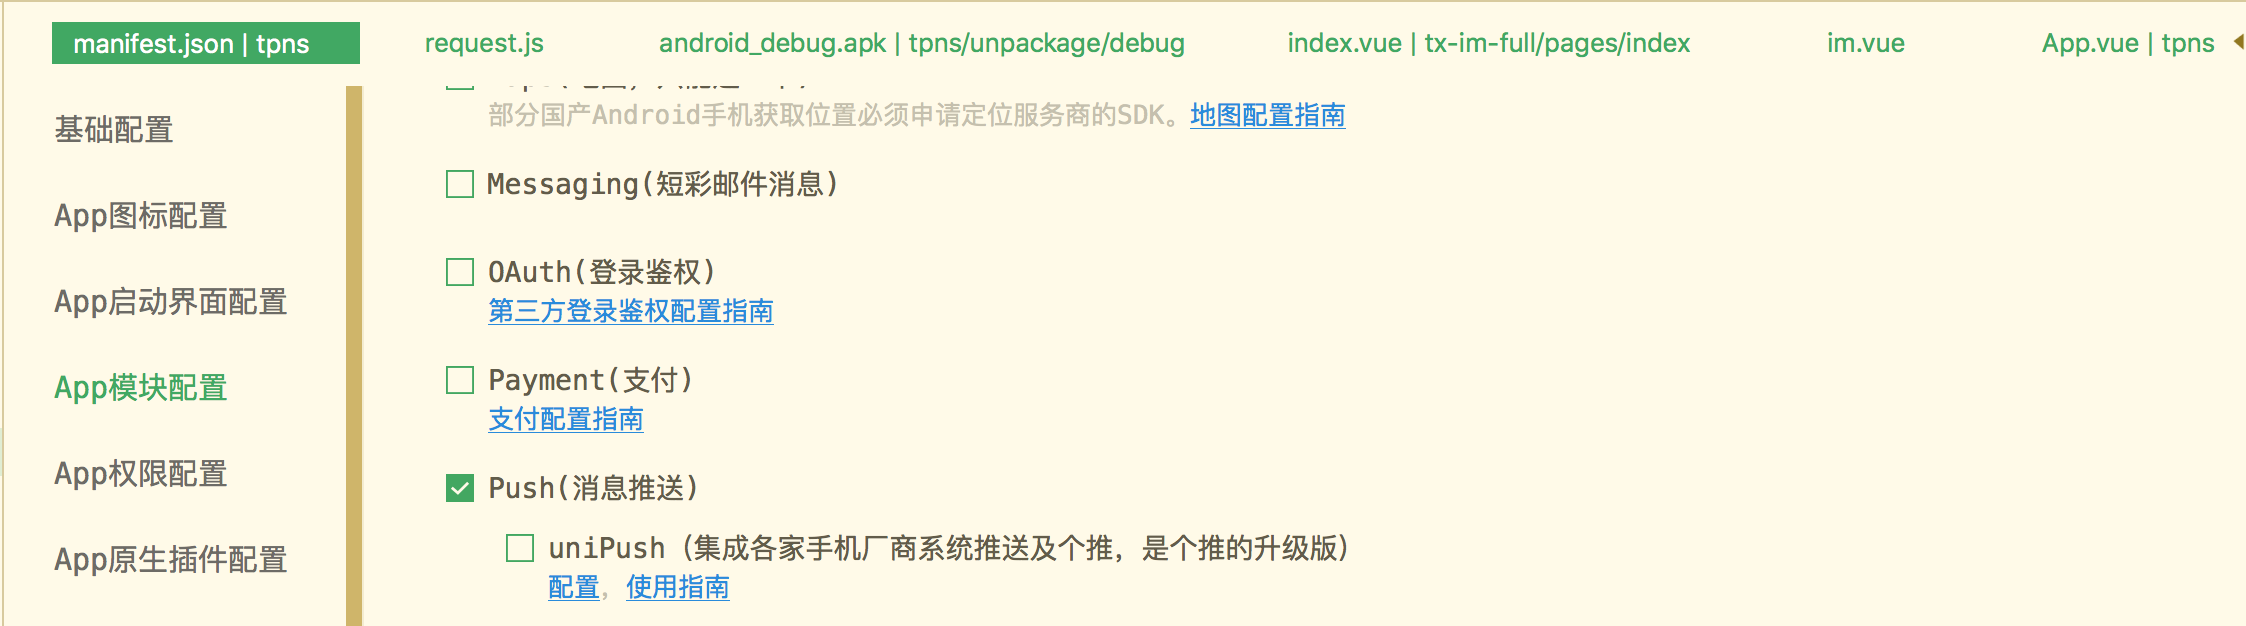
5.打开push功能
6.制作自定义基座
使用自己的安卓和ios证书,不要用公用证书
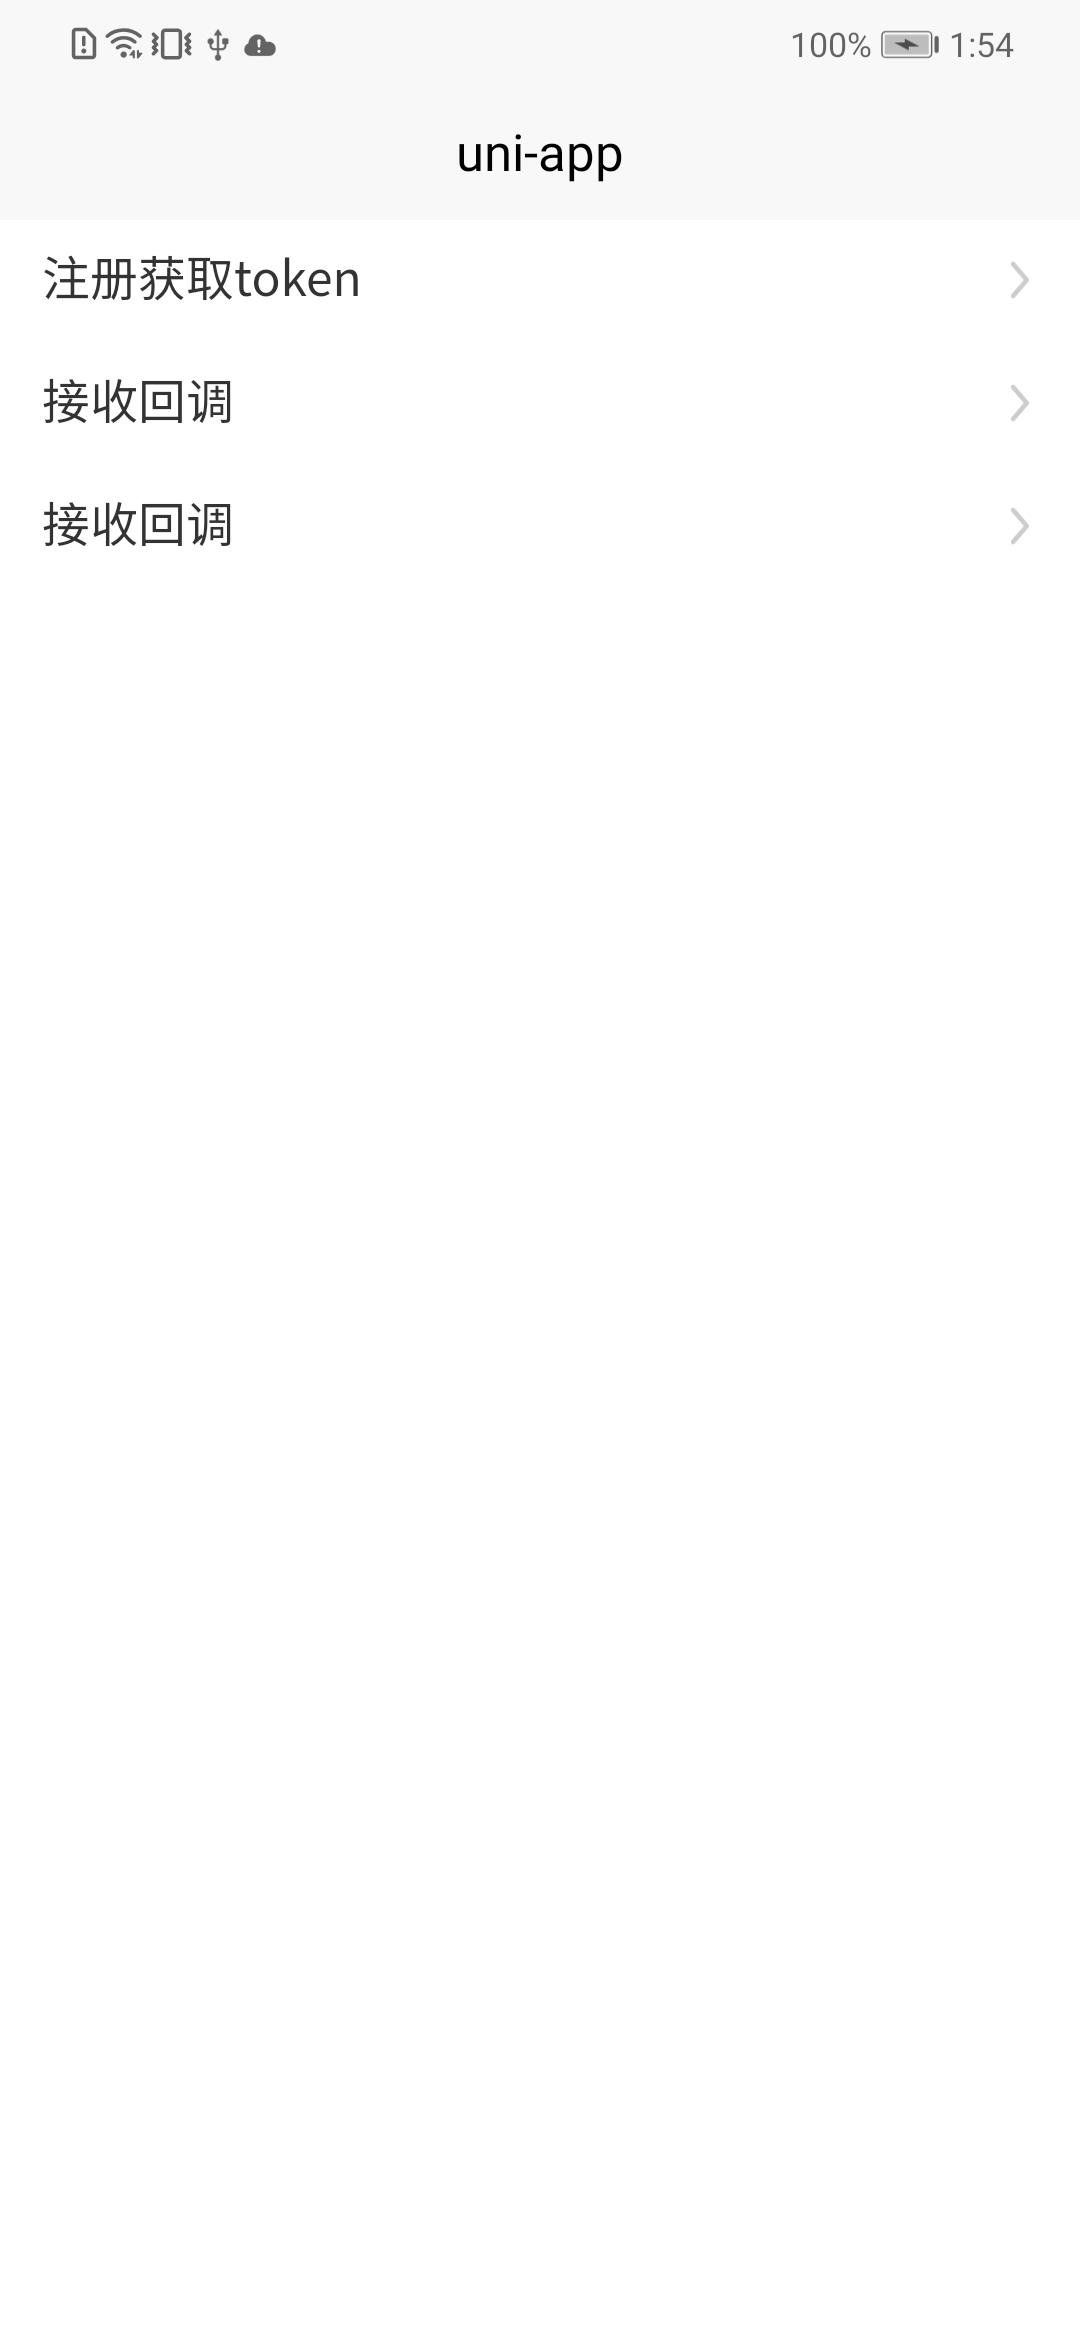
7.运行自定义基座
//默认是关闭的,如果去腾讯后台提交工单需要日志可以调用此方法打开日志
tpns.enableDebug(true);
//设置接受回调
tpns.addReceiveNotificationListener(result=>{
                    console.log(result);
                 })
//设置打开回调
tpns.addOpenNotificationListener(result=>{
                    console.log(result);
})
//注册获取token
tpns.registerPush({},result=>{
                    console.log(result);
                    //如果是安卓调用此方法获取手机厂商的三方token,ios请忽略
                    let token = tpns.getOtherPushToken();
 })
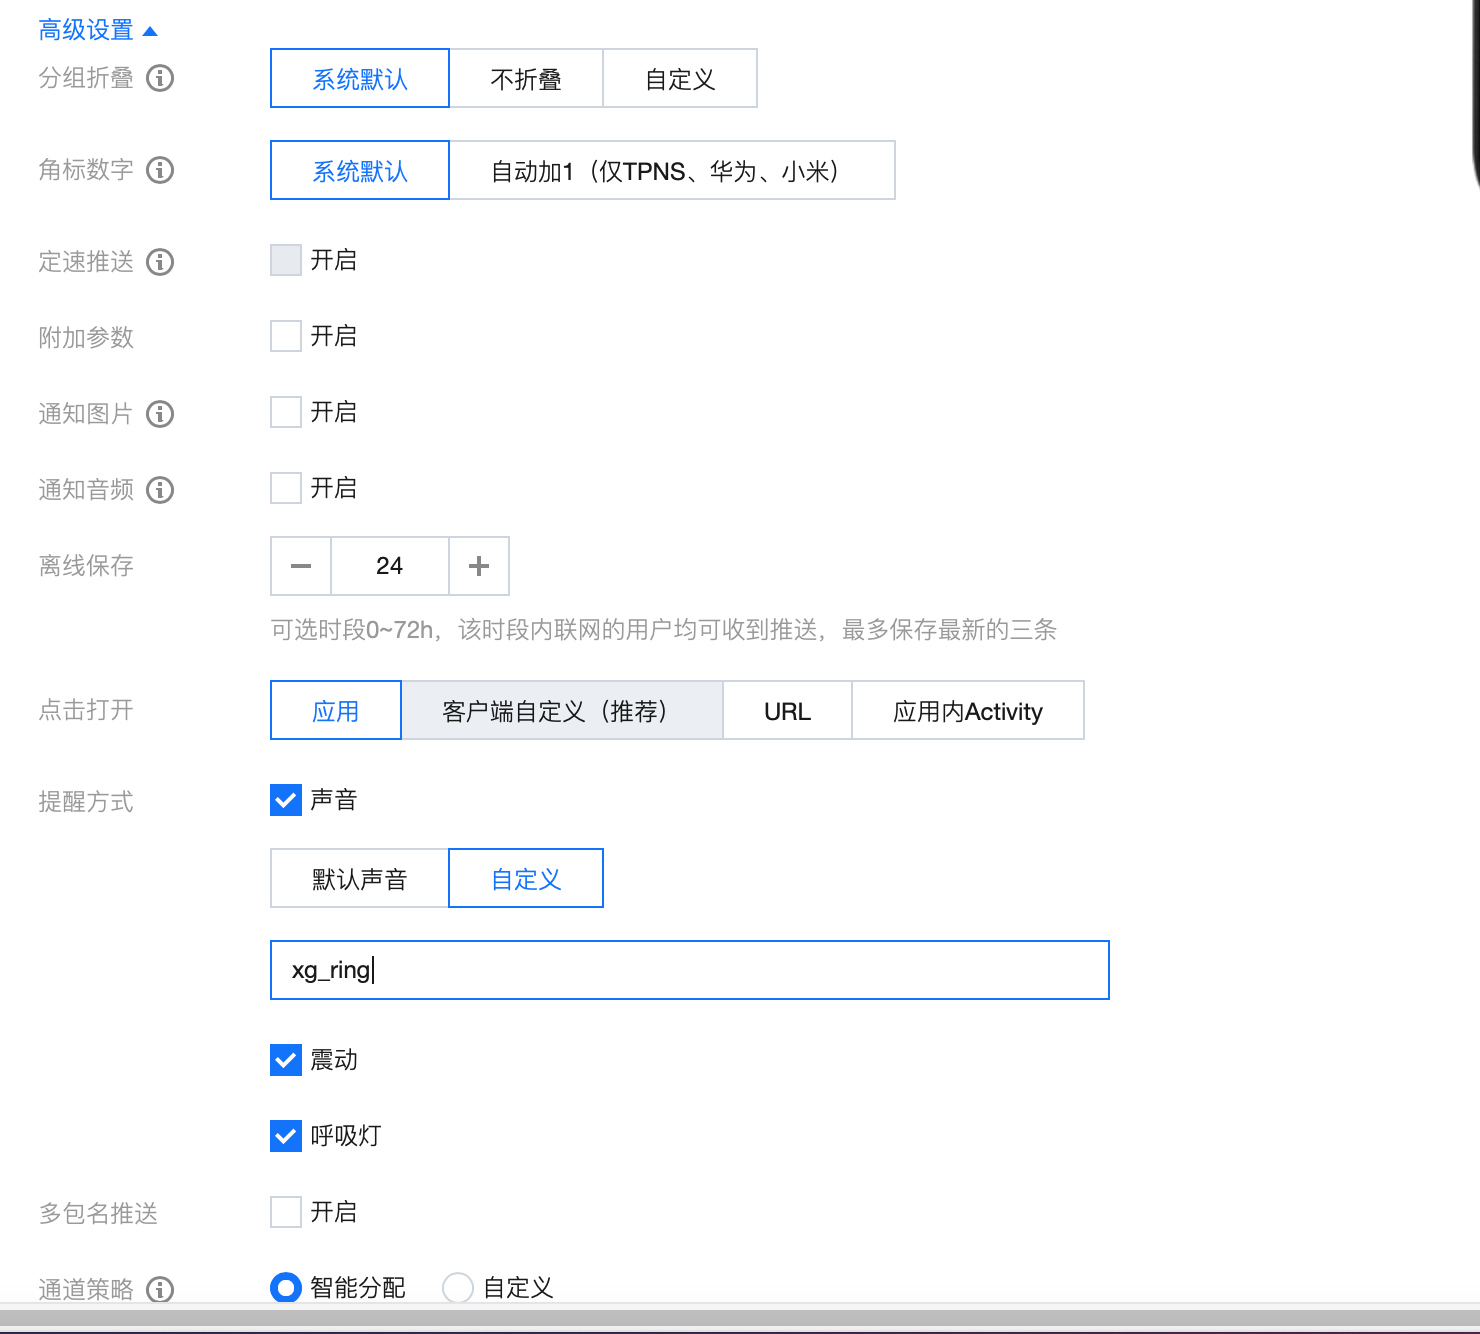
关于自定义铃声
1.下载nativeplugins
https://vkceyugu.cdn.bspapp.com/VKCEYUGU-cc83c99e-77d9-468b-ad38-6a0510afaea4/fcdc507d-cf90-444d-8459-60bf4c198622.zip
将该目录放到与manifest.json文件同级
2.andriod在raw目录下将铃声文件拷贝进去

3.ios在BundleResources目录中,讲声音文件拷贝进去
3.制作自定义基座
4.进入tpns的控制台点击推送指定的铃声
关于fcm通道的接入
在main.js同级目录创建文件nativeplugins文件夹,然后里面再创建文件夹TX-TPNS,在进入里面创建android,在进入andriod里面创建assets,最后把google-services.json放到assets里面,云打包就行了


 购买(
购买( 试用
试用
 使用 HBuilderX 导入示例项目
 赞赏(1)
赞赏(1)
 下载 4254
 赞赏 3
赞赏 3

 下载 13349


 赞赏 1
赞赏 1


 赞赏
赞赏
 京公网安备:11010802035340号