

 下载插件并导入HBuilderX
 下载示例项目ZIP
 赞赏(0)
赞赏(0)
更新记录
1.0.0(2021-05-31) 下载此版本
项目初始化
平台兼容性
云端兼容性
| 阿里云 | 腾讯云 | 支付宝云 |
|---|---|---|
| √ | √ | × |
云函数类插件通用教程
使用云函数类插件的前提是:使用HBuilderX 2.9+
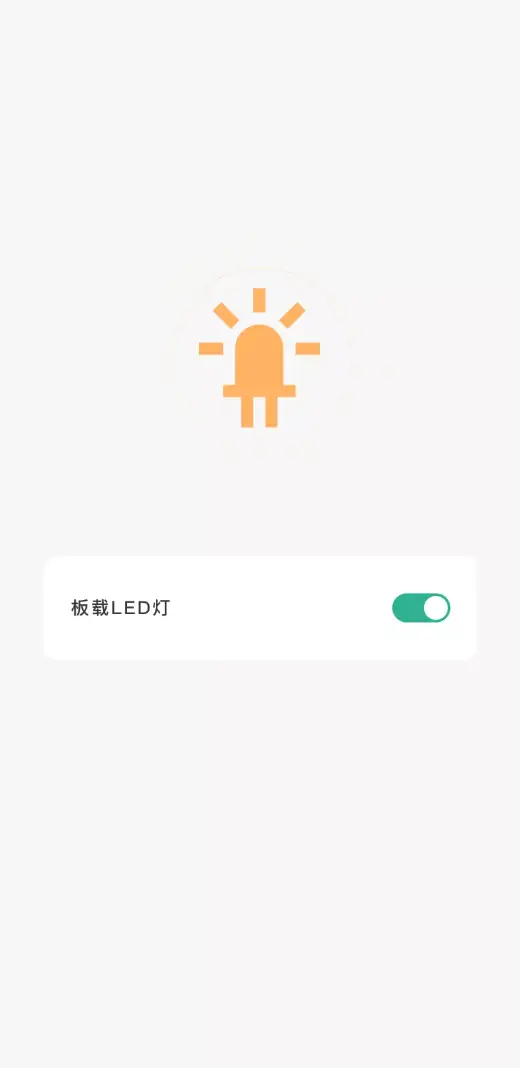
效果图
本项目旨在为大家提供一个物联网项目入门的模板,所采用的物联网硬件是目前较为便宜的带有WIFI联网功能的NodeMCU,某宝上只要10几元钱。 本项目主要是给对物联网项目开发感兴趣的新人看的,介绍了如何配置NodeMCU的开发环境,如何使用代码实现NodeMCU上自带LED的闪烁,如何接入阿里云物联网平台实现远程控制,如何接入UniCloud实现移动端远程控制。
搭建NodeMCU开发环境并实现本地控制:
关于NodeMCU的入门知识以及如何配置,推荐参考这篇文章,写的非常详细:NodeMCU小白手把手入门。
NodeMCU接入阿里云物联网平台实现远程控制:
1、登入物联网平台控制台
2、创建产品
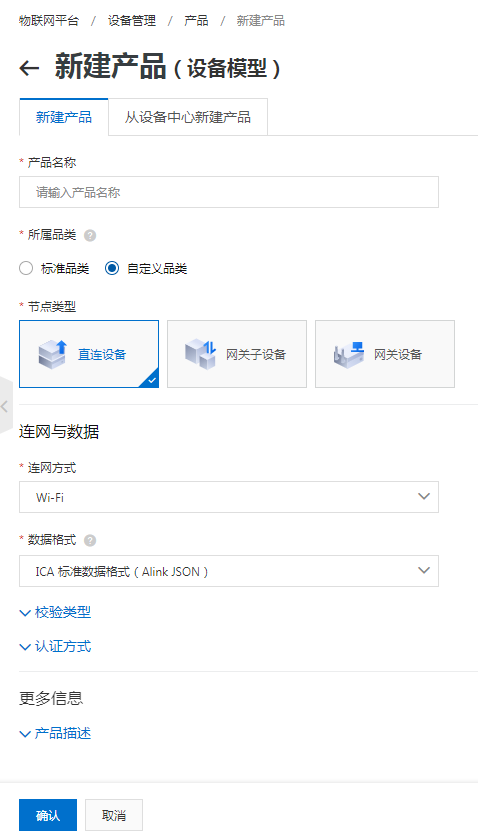
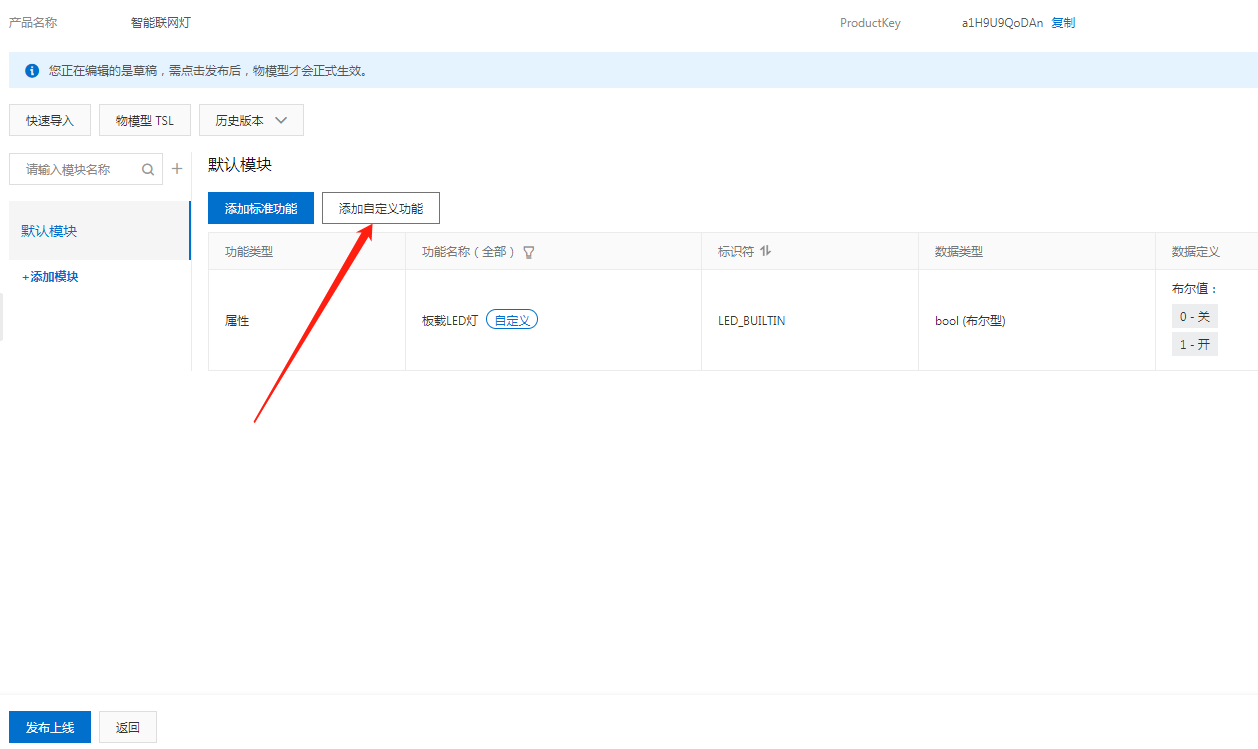
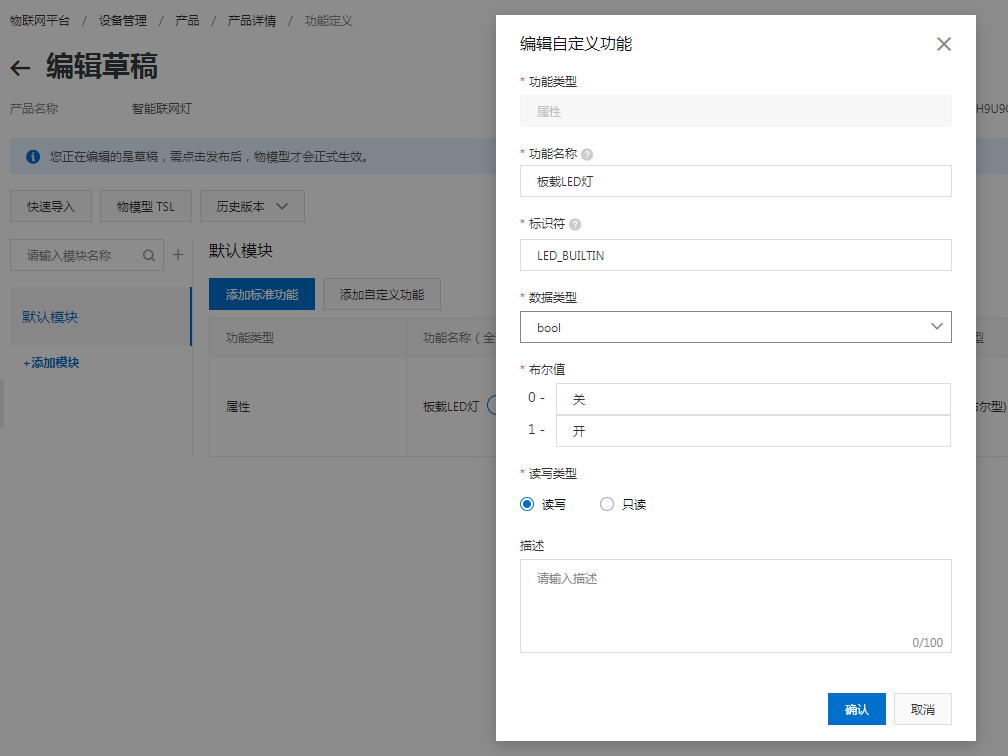
3、为产品定义功能
这里的定义功能主要是产品参数。用于设备与网络平台上传递参数。如果之前选择标准品类则会自动生成一些默认参数,而且有预置的参数类型;这里我们选择的是自定义品类,所以需要自定义功能参数。
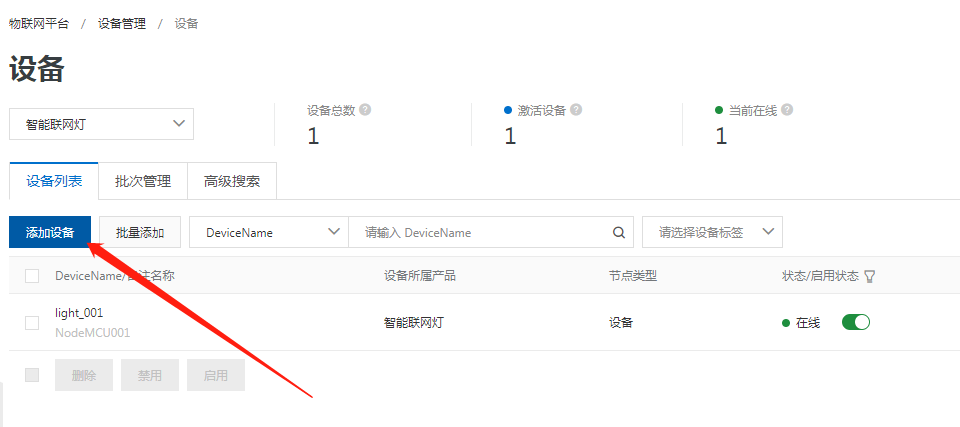
 4、创建设备
阿里云物联网平台中,同一款产品可以有多个设备。在这里新建一个设备,名字是light_001。
4、创建设备
阿里云物联网平台中,同一款产品可以有多个设备。在这里新建一个设备,名字是light_001。
 5、编写NodeMCU代码
代码如下,其中WIFI和设备相关信息需修改替换为自己的信息。
5、编写NodeMCU代码
代码如下,其中WIFI和设备相关信息需修改替换为自己的信息。
#include <ESP8266WiFi.h>
#include <PubSubClient.h>
/* 依赖 ArduinoJson 5.13.4 */
#include <ArduinoJson.h>
#include <MD5_String.h>
#include "DFRobot_Aliyun.h"
/* 需修改替换为您的WIFI SSID和密码 */
char* ssid = "ChinaNet-L7nq";
char* password = "jpp6gsmt";
/*配置设备证书信息*/
String ProductKey = "a1H9U9QoDAn";
String ClientId = "000001";/*自定义ID*/
String DeviceName = "light_001";
String DeviceSecret = "8e2e7af068a1a40f0a8275cd7c942fc0";
/*配置域名和端口号*/
String ALIYUN_SERVER = "iot-as-mqtt.cn-shanghai.aliyuncs.com";
uint16_t PORT = 1883;
/*需要上报和订阅的两个TOPIC*/
const char * subTopic = "/sys/a1H9U9QoDAn/light_001/thing/service/property/set";//****set
const char * pubTopic = "/sys/a1H9U9QoDAn/light_001/thing/event/property/post";//******post
DFRobot_Aliyun myAliyun;
WiFiClient espClient;
PubSubClient client(espClient);
/**
* 连接阿里云物联网Iot
*/
void ConnectAliyun(){
while(!client.connected()){
Serial.println("Attempting MQTT connection...");
/*根据自动计算的用户名和密码连接到Alinyun的设备,不需要更改*/
Serial.println(myAliyun.client_id);
Serial.println(myAliyun.username);
Serial.println(myAliyun.password);
Serial.println(client.connect(myAliyun.client_id,myAliyun.username,myAliyun.password));
if(client.connect(myAliyun.client_id,myAliyun.username,myAliyun.password)){
Serial.println("connected");
client.subscribe(subTopic);
}else{
Serial.print("failed, rc=");
Serial.print(client.state());
Serial.println(" try again in 5 seconds");
delay(5000);
}
}
}
/**
* 回调监听
*/
void callback(char *topic, byte *payload, unsigned int len)
{
Serial.print("Message arrived [");
Serial.print(topic);
Serial.print("] ");
for (int i = 0; i < len; i++){
Serial.print((char)payload[i]);
}
Serial.println();
StaticJsonBuffer<300> jsonBuffer;
JsonObject& root = jsonBuffer.parseObject((const char *)payload);
if(!root.success()){
Serial.println("parseObject() failed");
return;
}
char set_topic[] = "/sys/a1H9U9QoDAn/light_001/thing/service/property/set";
//Serial.print(strcmp(topic,set_topic));
//因为阿里云自动订阅了post_reply消息,所以需要过滤一下
if(strcmp(topic,set_topic) == 0){
const uint16_t LedLightSwitch = root["params"]["LED_BUILTIN"];
Serial.print("Set LedLightSwitch: ");
if(LedLightSwitch == 1){
digitalWrite(LED_BUILTIN, LOW); //板载LED低电平为开灯
Serial.print(LedLightSwitch+":开灯");
}else{
digitalWrite(LED_BUILTIN, HIGH);
Serial.print(LedLightSwitch+":关灯");
}
Serial.println();
/*上报开关灯信息*/
String tempMseg = "{\"id\":"+ClientId+",\"params\":{\"LED_BUILTIN\":"+LedLightSwitch+"},\"method\":\"thing.event.property.post\"}";
char sendMseg[tempMseg.length()];
strcpy(sendMseg,tempMseg.c_str());
client.publish(pubTopic,sendMseg);
}
}
void setup() {
Serial.begin(115200);
Serial.println();
pinMode(LED_BUILTIN, OUTPUT);
WiFi.begin(ssid, password);
while (WiFi.status() != WL_CONNECTED) {
delay(500);
Serial.print(".");
}
Serial.println("");
Serial.println("WiFi connected");
Serial.print(WiFi.localIP());
/*初始化Alinyun的配置,可自动计算用户名和密码*/
myAliyun.init(ALIYUN_SERVER,ProductKey,ClientId,DeviceName,DeviceSecret);
client.setServer(myAliyun.mqtt_server,PORT);
/*设置回调函数,当收到订阅信息时会执行回调函数*/
client.setCallback(callback);
/*连接到Aliyun*/
ConnectAliyun();
/*开机先关灯*/
digitalWrite(LED_BUILTIN, HIGH);
/*上报关灯信息*/
String tempMseg = "{\"id\":"+ClientId+",\"params\":{\"LED_BUILTIN\":0},\"method\":\"thing.event.property.post\"}";
char sendMseg[tempMseg.length()];
strcpy(sendMseg,tempMseg.c_str());
client.publish(pubTopic,sendMseg);
}
void loop() {
//待优化增加心跳功能,保持设备在线
client.loop();
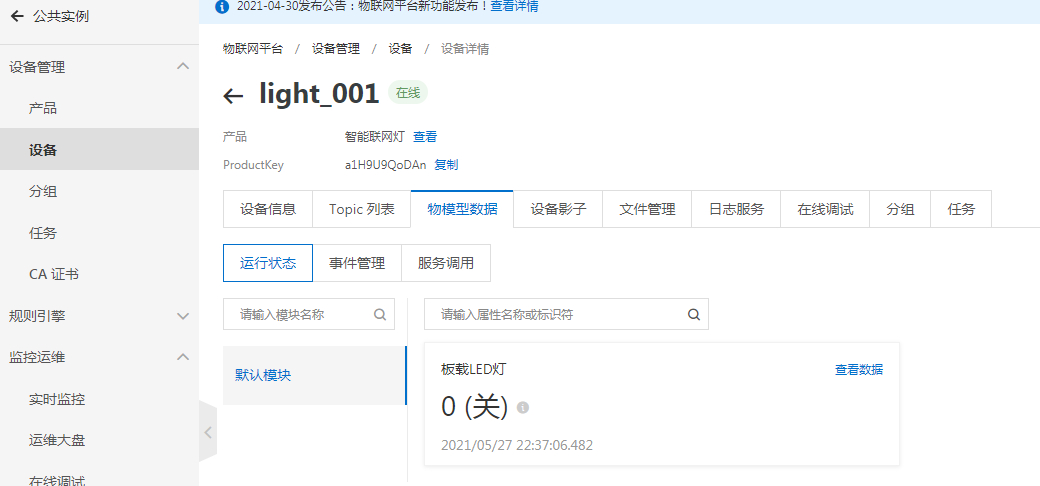
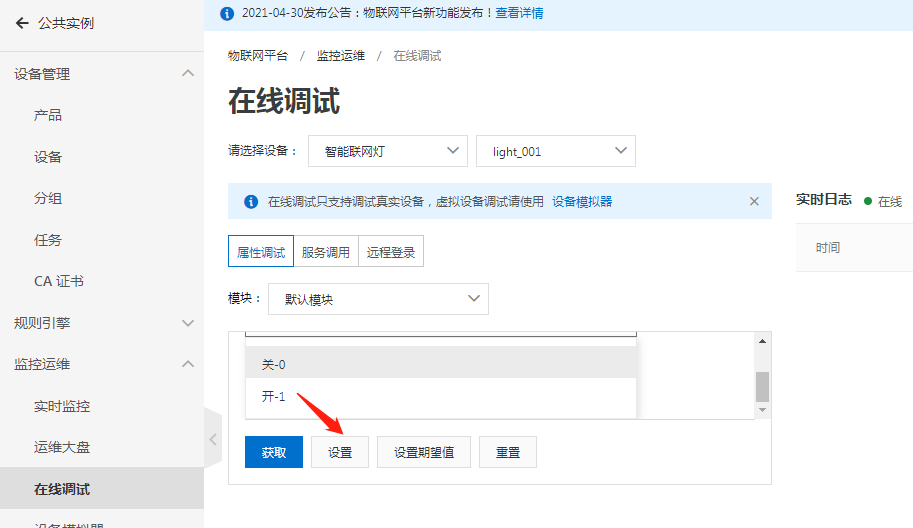
}5、测试
打开设备-物模型数据即可查看当前设备的在线情况以及属性数据,也可以在监控运维-在线调试中给设备发送消息以便设置属性值实现LED灯的开和关。
创建Uniapp项目并接入UniCloud实现移动端远程控制:
第一步 创建uniCLoud
效果图:

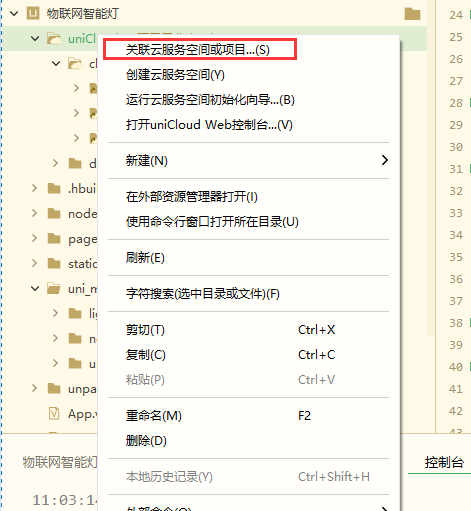
第二步 关联云空间
第三步 安装依赖包
进入插件目录 安装依赖包

通用方法
'use strict';
const Core = require('@alicloud/pop-core');
var client = new Core({
  accessKeyId: 'LTAIe9tSyTlDuia4',
  accessKeySecret: 'nJEzQBdMOuNV8Z5YDSRwGqSrsovAic',
  endpoint: 'https://iot.cn-shanghai.aliyuncs.com',
  apiVersion: '2018-01-20'
});

var params = {
  "RegionId": "cn-shanghai",
  "NodeType": "0",
  "Action": "QueryDevicePropertyStatus",
  "ProductKey": "a1H9U9QoDAn",
  "DeviceName": "light_001",
}
var requestOption = {
  method: 'GET'
};

async function getIotInfo() {
    const result = await client.request('QueryDevicePropertyStatus', params, requestOption);
    // console.log(result.Data.List.PropertyStatusInfo);
    return result.Data.List.PropertyStatusInfo;
}
async function setDeviceProperty(operation) {
  var params2 = {
    "RegionId": "cn-shanghai",
    "Items": "{   \"LED_BUILTIN\": " + operation + " }",
    "DeviceName": "light_001",
    "ProductKey": "a1H9U9QoDAn"
  }

  var requestOption2 = {
    method: 'POST'
  };
  const result = await client.request('SetDeviceProperty', params2, requestOption2);
  return result;
}
// 获取联网灯状态
exports.main = async (event, context) => {
    //event为客户端上传的参数
    console.log('event : ', event)

    //返回数据给客户端
    return getIotInfo()
};

// 点灯开关

 exports.main = async (event, context) => {
  //event为客户端上传的参数
  console.log('event : ', event)

  //返回数据给客户端
  return setDeviceProperty(event.value)
};
 下载 734
 赞赏 0
赞赏 0

 下载 34724
 赞赏 158


 赞赏
赞赏
 京公网安备:11010802035340号